Chocolate Mint Bars
Wed, Mar 17, 2010
Cakes, Cupcakes & Brownies, Cookies, Desserts, DessertStalking, Fun Family Activities, Holidays, Honest Cooking, Itsy Bitsy Foodies Sightings, Search by Course, St. Patrick's Day, TasteSpotting
 Print This Recipe
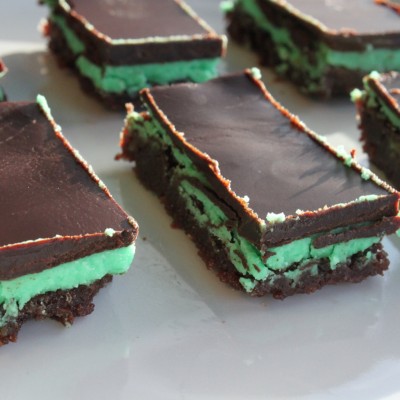
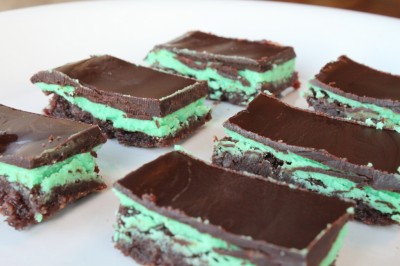
One of my favorite candies is Andes Chocolate Mints. With this recipe, you can leave the mint frosting white but I like to color it green so that it looks like Andes mints. {And the touch of green gets you out of being pinched on St. Paddy’s Day!}
This recipe came from one of my Grandma’s dearest friends. The original recipe calls for nuts which I omitted. It also calls for flour, which I forgot to add this time around. Actually, I remembered once the chocolate batter was in the greased pan. I took the opportunity to experiment, adding flour to only half of the pan. It turns out that the flour-less version wins, in my opinion! The “with-flour” version is more like a brownie with mint frosting. The flour-less version is more like an Andes mint…a denser chocolate layer topped with mint and chocolate. Both are very good but I prefer the latter.
Happy St. Patrick’s Day!
| Chocolate Mint Bars |
- Bottom Chocolate Layer
- 2 eggs
- 1/2 cup butter, melted
- 1 cup sugar
- 1/2 tsp peppermint extract
- 2 squares unsweetened chocolate, melted
- 1/2 cup flour, optional
- Middle Mint Frosting
- 2 Tbsp butter, softened
- 1 Tbsp cream
- 1 tsp peppermint extract
- 1 cup powdered sugar
- Green food coloring, optional
- Top Chocolate Layer
- 2 squares unsweetened chocolate, melted
- 2 Tbsp butter, melted
- In a bowl, beat the eggs.
- Add the melted butter and sugar.
- Mix in the peppermint and melted chocolate.
- Stir in the flour if you want a brownie layer. (I prefer the flour-less version.)
- Pour the chocolate batter in a greased 9-inch pan.
- Bake at 350 degrees for 25 minutes. If you do the flour-less version, check after 15 minutes. Don’t overbake them because they will set as they cool.
- Cool for at least 30 minutes.
- Blend all of the ingredients well.
- If desired, stir in several drops of green food coloring.
- Spread the mint frosting on the cooled baked chocolate layer.
- Place in the refrigerator to chill for five minutes.
- Mix the melted chocolate and butter well.
- Once the middle mint frosting is firm, spread the butter-chocolate mixture over the top.
- Place in the refrigerator to chill for five minutes.
- Cut the chocolate mint bars into strips or squares, as desired.
- Store the chocolate in a sealed container in the refrigerator.
Tags: Andes mints, chocolate, chocolate mint, decadent chocolate dessert, layered bar dessert, peppermint


 (+13 rating, 8 votes)


my girls love andes mint pies…this looks like it would be even more poplular!!
my neighbor use to make these for us – I loved them!
Oh these look awesome, my kids love Andes candies as well, yes, they inherited that from me! I have got to make these.
I love Andes Mints! I bet these brownies are amazing.
New follower, it so nice to meet you. Lovely recipe.
Yummy! I posted a link to this on my blog…thru my pinterest board.
Thanks!
Jennifer @ The Craft Barn
What kind of of cream did u use? Heavy cream? All purpose cream? I want to make these lovely bars 🙂
I used heavy cream but I think any cream would work.
I just made these but had to scrape off the top layer and replace it with melted chocolate chips and a little heavy cream. I believe you are missing an ingredient in the top layer because it tastes extremely bitter with only butter and unsweetened chocolate. Other than that, so tasty!