Natural Easter Egg Dyes
Thu, Mar 18, 2010
Cooking Projects, Disguising Healthy Foods, Easter, Feingold Association, Foodgawker, Fun Family Activities, Holidays, Honest Cooking, Itsy Bitsy Foodies Sightings, Taste For Life, TasteSpotting
 Print This Recipe
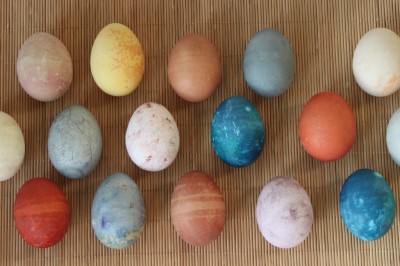
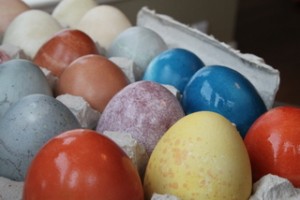
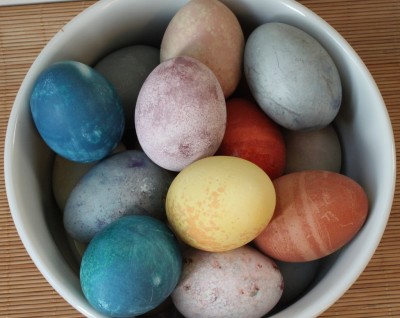
Appreciate the vivid colors and natural beauty of fruits, vegetables and spices: dye your Easter eggs with everyday foods rather than boxes of chemical colorings. This is a great family project and learning experience. Though it will take a little more planning than your basic Easter egg dye box, I think you will find the extra time well worth it. Even though I’m a grown-up, I felt a child-like excitement watching the eggs turn colors in bowls of cabbage, spinach, blueberries and more!
With some of the dyes, it is best to boil the eggs with the natural substance to achieve the most vibrant color. I have indicated these below with an asterisk. With others, you can hard-boil the eggs first and then soak them in the respective natural dye.
For more vibrant colors, place the sealed containers of natural dyes in the refrigerator and let the cooked eggs soak overnight. Adding vinegar to the boiling water will also help make the colors brighter. (One exception is with onion skins; do not add vinegar to the onion skins.) If you want shiny eggs, rub them with some vegetable oil once the dye is dry.
I have listed below the foods that I tried along with my comments. The ones in bold were my favorites. I have also listed a few recommendations that I didn’t try this time around but that I’ve heard work well. Let your kids take part in the brainstorming process of deciding what foods to use. And watch as they are surprised and amazed at the results. (I didn’t expect purple
| Natural Easter Egg Dyes |
- White Eggs
- Cold Water
- Vinegar (Roughly 2 Tbsp to every pot of eggs you boil, except for the onion skins)
- Natural Dye Ideas:
- Pink – Beets*
- Yellow – Golden Beets (in chunks)*
- Yellow – Turmeric
- Other Yellow Options – Orange Peels*, Green Tea, Cumin
- Orange – Chili Powder
- Other Orange Options -Carrots (in chunks)* or carrot juice
- Blue – Crushed Blueberries
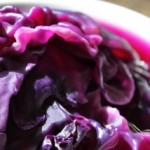
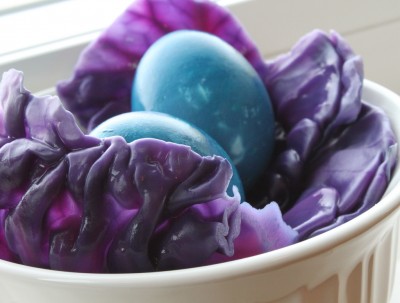
- Blue – Purple Cabbage Leaves*
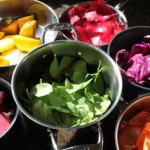
- Green – Spinach*
- Other Green Options – Grass (rinsed and blended with water)
- Orange-Brown – Red Onion Skins*
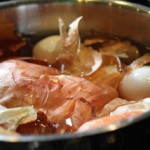
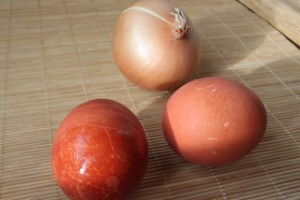
- Bronze-Orange – Yellow Onion Skins*
- Lavender – Purple Grape Juice
- Red – Lots of Red Onion Skins*
- Violet Blue – Red Onion Skins*
- Use a separate pan for each color.
- Add the eggs, natural substance, roughly 2 Tbsp vinegar and cold water to a pan.
- You just want to cover the eggs with water. (You want the color to be as concentrated as possible so be careful not to use too much water or else the color will be diluted.)
- Bring the eggs to a boil and let the mixture boil for 1 minute.
- Remove the pan from heat, cover it with a lid, and let simmer for 10-12 minutes.
- I found that after the initial cooking time, the colors were not that vibrant. I recommend transferring the eggs, liquid and some of the natural substance to a bowl and letting them cool completely.
- Cover the bowl with plastic wrap and place it in the refrigerator to let the eggs dye for several hours or over night. (I like including some of the fruit/vegetable substance because it adds patterns and specks to the eggs. If you want a more solid color, let the eggs soak over night in only the colored liquid.)
- Place the white eggs in the bottom of a deep pan.
- Cover with roughly 2 Tbsp vinegar and cold water.
- Bring to a boil and let boil for one minute.
- Remove the pan from the heat, cover it with a lid, and let simmer for 10-12 minutes.
- Using a separate bowl for each color, mix the natural dyes with the eggs.
- You want the eggs to be completely covered by the dye but you want the color to be as concentrated as possible.
- Once the eggs are dyed, remove them from the colored liquid, rinse them with cold water and let them air dry for 5 minutes.
- Pat them dry with a paper towel.
- For a shiny finish, rub them with vegetable oil.
- Be careful with all of the dyes as they may stain.
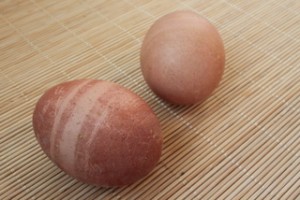
- Pink – Beets* – I cut one beet into chunks and cooked it with the eggs. The eggs turned a pale Victorian pink. For a brighter pink, I will try grating the beets next time or soaking pre-cooked eggs in beet juice.
- Yellow – Golden Beets (in chunks)* – I cut one golden beet into chunks and cooked it with the eggs. The dye was a bright yellow but the eggs only turned a very pale yellow. For a brighter yellow, I will try soaking pre-cooked eggs in golden beet juice.
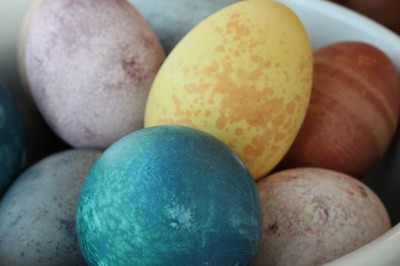
- Yellow – Turmeric – I put about 1 tsp turmeric powder in a small jar of water (big enough for only one egg). The egg turned bright yellow with some orange specks.
- Orange – Chili Powder – I put about 1 tsp chili powder in a small jar of water (big enough for only one egg). The egg turned a very pale orange. I probably won’t do this one again; I will try carrots or carrot juice instead.
- Blue – Crushed Blueberries – I put about 1/4 cup frozen blueberries in a tall glass of water with two cooked eggs. I stirred the blueberries, squishing them against the glass and the eggs. The eggs turned a pale blue with some very interesting specks and streaks where the fruit touched the shell.
- Blue – Purple Cabbage Leaves* – I boiled two eggs with roughly half of a head of purple cabbage. It was a surprise because contrary to the striking purple color of the dye, the eggs turned a brilliant bright blue.
- Green – Spinach* – I boiled a bag of spinach with two eggs. The dye was very pale so I added a box of frozen spinach in hopes of intensifying the green. The eggs stayed a very pale green. For a brighter green, next time I will try soaking pre-cooked eggs in spinach juice.
- Orange-Brown – Red Onion Skins* – I boiled two eggs with the skins of roughly three red onions. I expected the eggs to be a pale blue or purple but they turned a light brownish-orange. Next time I will try adding some of the actual shiny bright purple onion flesh to hopefully get more of a violet blue color.
- Bronze-Orange – Yellow Onion Skins* – I boiled two eggs with the skins of roughly three yellow onions. The eggs turned a rich bronze-orange color. I loved the designs that the onion skins left on the eggs. Next time I will try intentionally wrapping the eggs in the onion skins to pattern the egg shells.
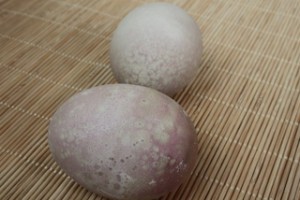
- Lavender – Purple Grape Juice – I dyed two eggs in a jar of grape juice concentrate. The eggs turned a bright pink-lavender color but the dye was too syrupy and washed right off when I rinsed the eggs. I then re-soaked them in grape juice (with water added to the mix). The result was an interesting speckled pink-lavender.
TIP: I found that narrow deep jars worked the best because I could ultimately use less water and have a more concentrated color.
Tags: beets, blueberries, chili powder, Easter eggs, eggs, grape juice, homemade food coloring, natural dyes, naturally dyed Easter eggs, onion skins, purple cabbage, spinach, turmeric


 (+19 rating, 11 votes)




What fantastic ideas, I can not wait to try these with my Grand kids. It will be a fun project
To intensify the colors or to adjust them try adding cream of tartar and/or alum (both in the spice section of supermarkets) to the liquids and watch what happens. Onion skins with a little of both of these will produce a bright yellow…try it!
Thank you for the tip! I can’t wait to try it.
Wow, these are really gorgeous! I think your naturally dyed eggs look much better than the artificially coloured ones – beautiful!
Red cabbage changes color according to the pH of the solution that it is in. More acid (such as vinegar) should turn the liquid more purple and more base(baking soda) should turn it more blue. I’d be interested to see if the eggs always come out blue or if these things might alter the color a little. They might not change anything if pH of the egg shell is determining the color…
http://www.cchem.berkeley.edu/demolab/images/cabbage4.jpg
Thank you for this information. I will experiment with this next time I dye eggs.
I’ve read about using natural dyes before and thought it’d be fun to try. Your gorgeous post has totally motivated me—the end result is spectacular! So thank you–I’m definitely going to share your efforts here! Awesome job.
thanks for the detailed list! I juiced two big bags of spinach for a very deep green juice, but apparently all the pigment is trapped in the fibers. soaking cooked eggs did nothing and boiling in the juice just separated the color into a froth on top and a sediment on bottom with a water in the middle that was no darker than residual liquid from steaming spinach. The best green I got was from double dipping into turmeric water and leftover cooked purple cabbage water.
I juiced beets and the resulting eggs were the about the color of your background wall paper.
the deepest color I got was nearly black from frozen blueberries boiled with a bit of vinegar…my kids used chalk on them (which I will wash off before peeling)
I juiced carrots and got only a very pale orange. (both cold soak and eggs boiled in it) double dipping beet juice followed by turmeric water did a better job, but still was a bit brownish.
Honestly, my favorite was the black from the blueberries.
Thank you for the detailed feedback and suggestions! It is good to know that juicing the spinach, etc. didn’t do much. Now I know for next time!!