Decoupage Easter Eggs
 Print This Recipe
Thanks to Pinterest, I came across these paper-napkin decoupage eggs from Martha Stewart. Her craft project uses blown-out eggs and Mod Podge to create longer-lasting decorative eggs. I decided to try a simpler approach with my three-year old son as an alternative to dyeing Easter eggs.
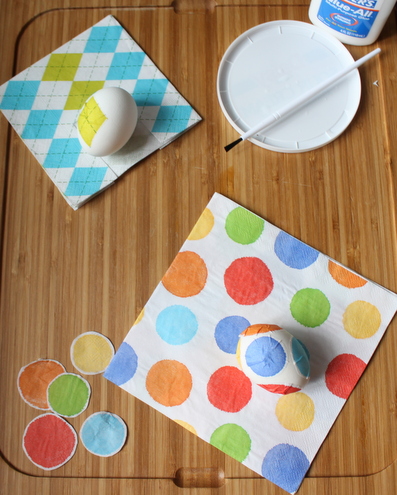
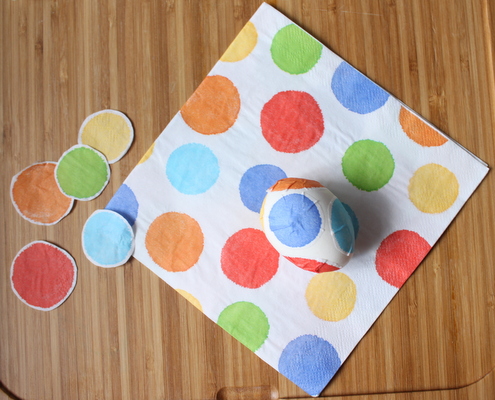
We used hard-boiled eggs and painted the paper napkin pieces onto the eggs with a diluted Elmer’s glue mixture. My son loved this art project. I cut out the napkin designs and he went to town with a paintbrush and the diluted glue. This simple arts and crafts project is appropriate for all ages and is relatively mess-free. I simply used the napkins that I had in the cupboard but the design and theme options are endless.
| Decoupage Easter Eggs |
- Hard-boiled eggs
- Paper napkins
- Elmer’s glue
- Water
- Paintbrush
- Place the eggs in the bottom of a deep pan.
- Cover the eggs with cold water.
- Bring the water to a boil and let it boil for one minute.
- Remove the pan from the heat, cover it with a lid, and let simmer for 10-12 minutes.
- Cut out designs from paper napkins.
- Separate the printed top layer and discard the blank sheets.
- Squeeze some Elmer’s glue into a bowl or onto a plastic lid.
- Add a few drops of water, stirring the mixture with a paintbrush, until you have a runny, diluted glue.
- Hold the designs on the egg and gently paint over them, completely coating them with the glue.
- Let the eggs air dry.
Tags: arts and crafts, decorating Easter eggs, decoupage, Easter, Easter eggs, paper napkins, tissue paper


 (No Ratings Yet)


Sun, Apr 1, 2012
Easter, Fun Family Activities, Holidays, Party and Decorative Ideas